


Tuesday, January 31, 2023

Monday, January 30, 2023
Day 23-24: Launcher go brr
* *Exceptions apply, see terms of service for details
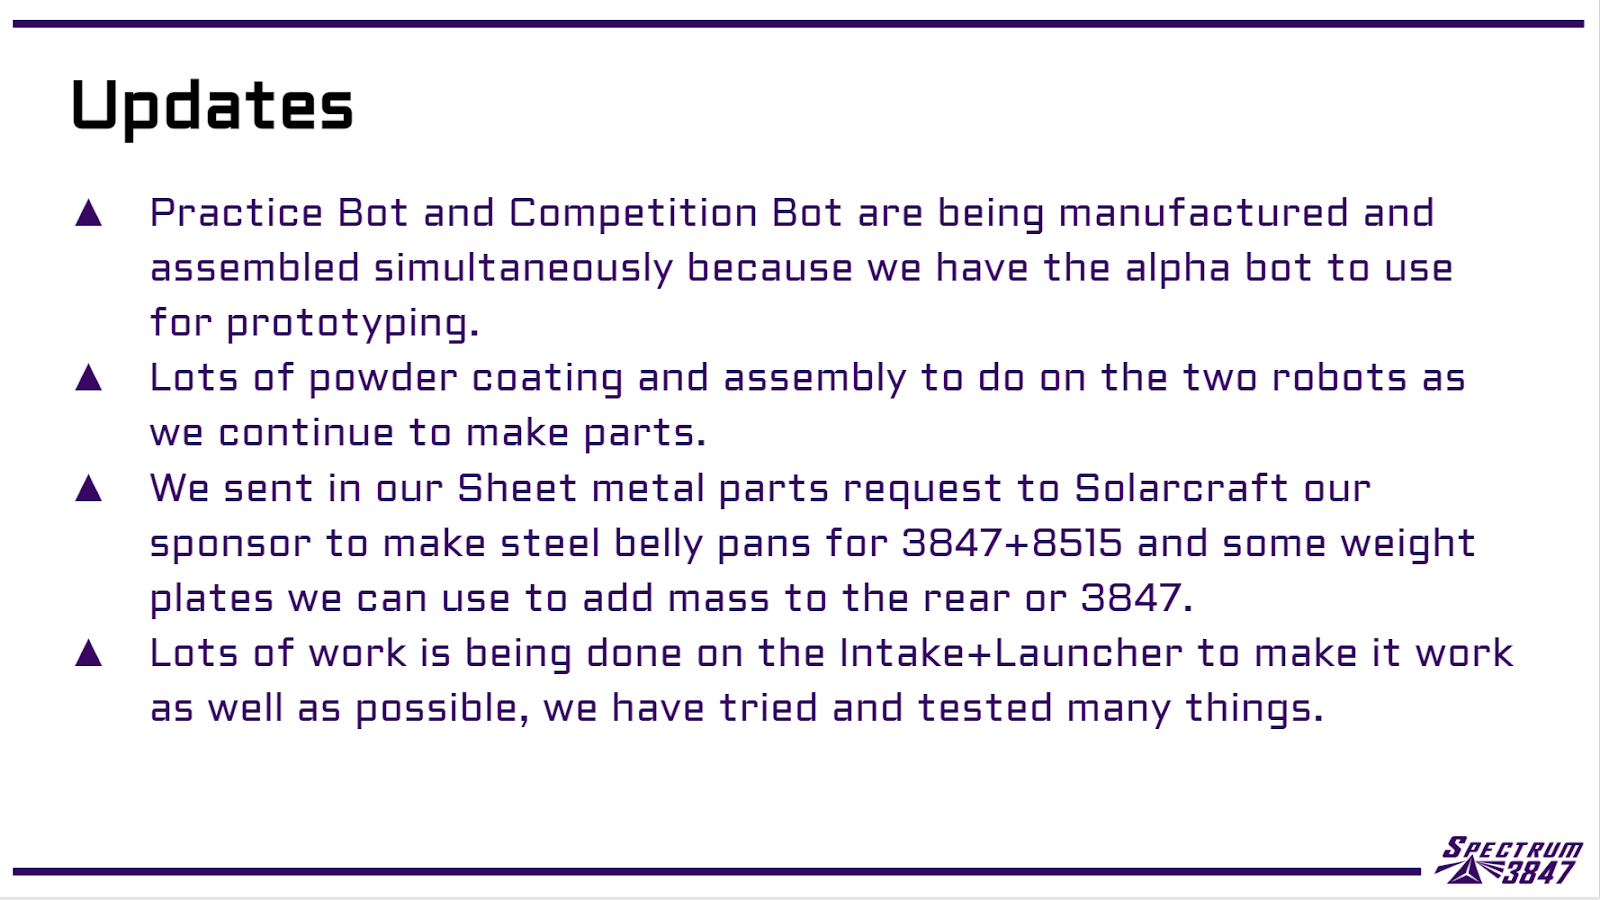
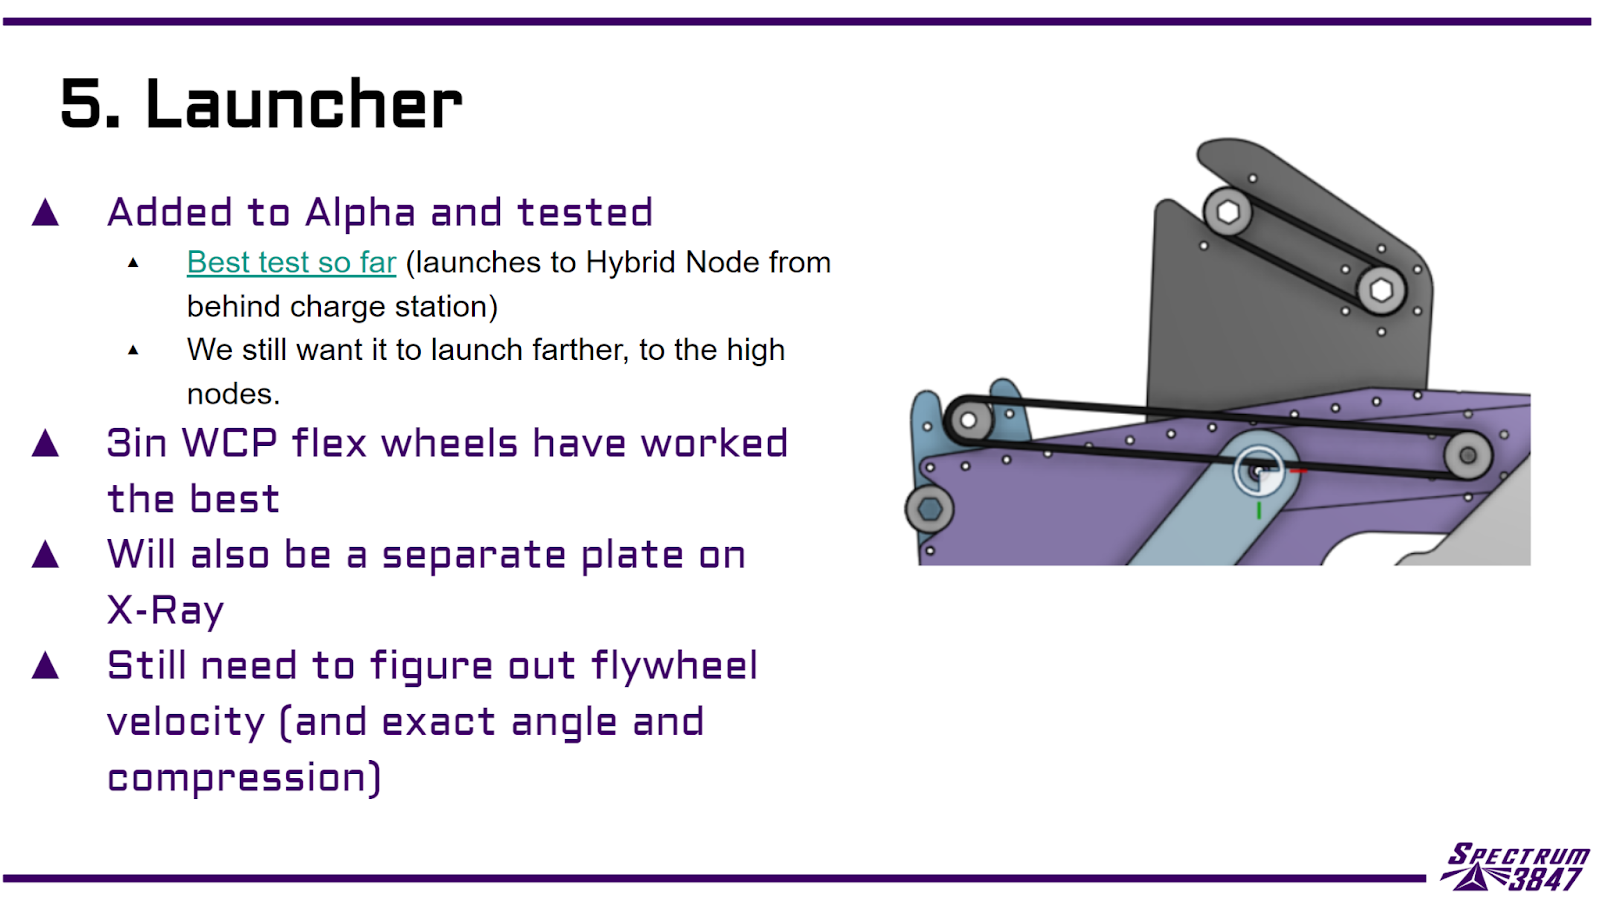
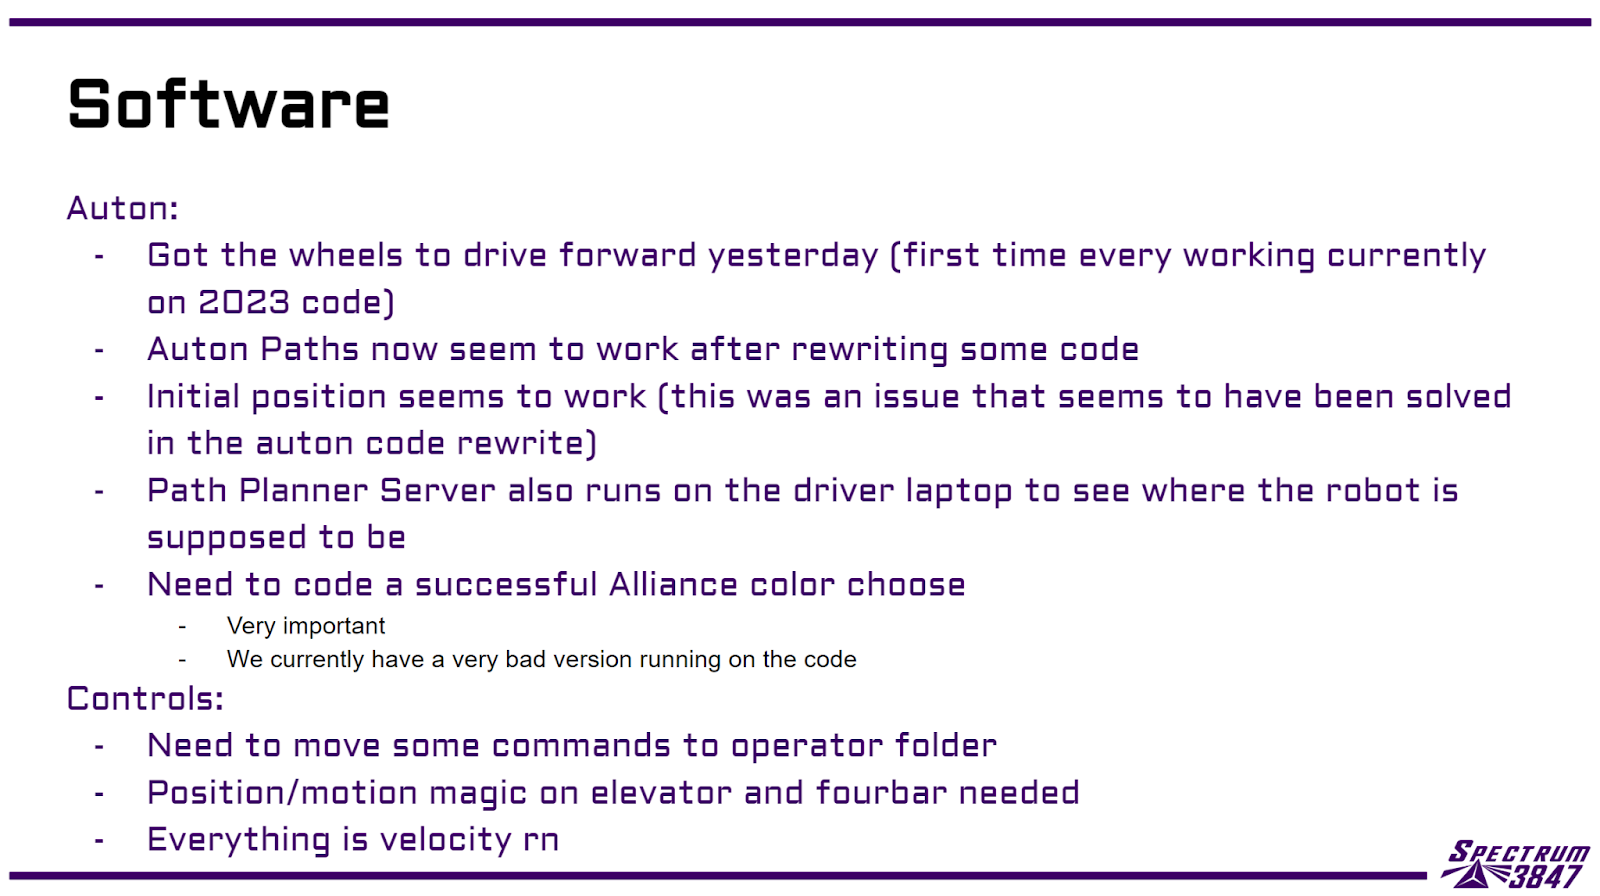
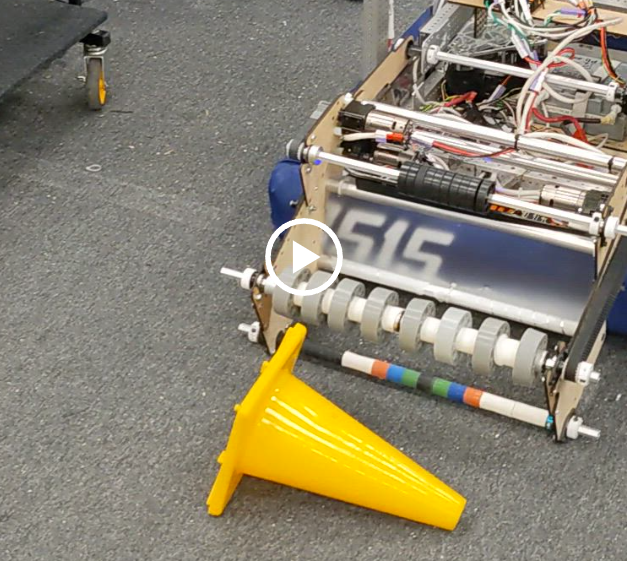
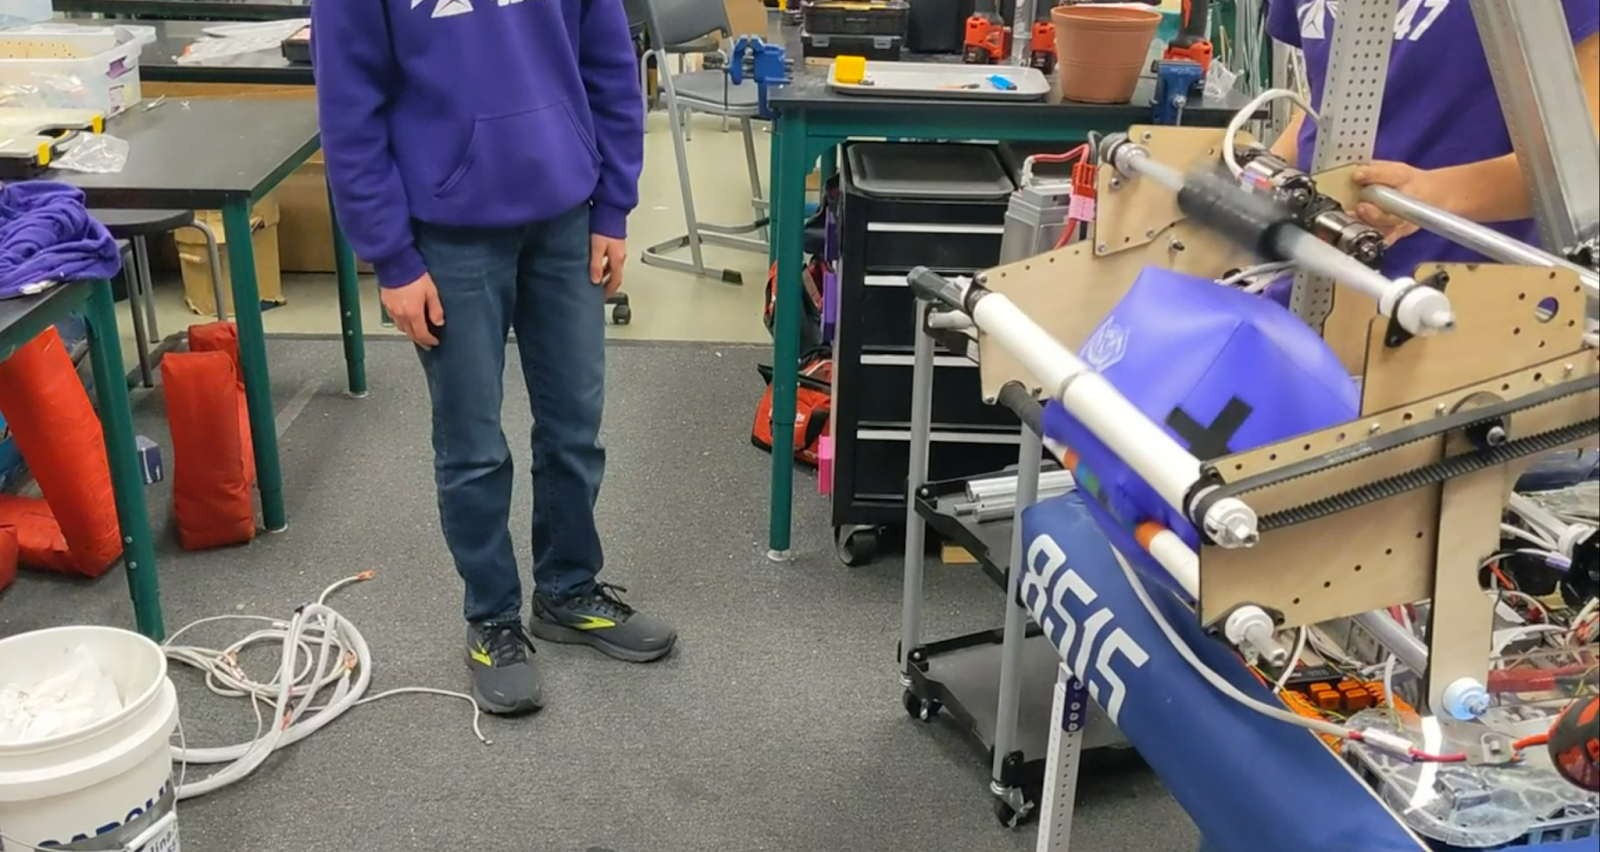
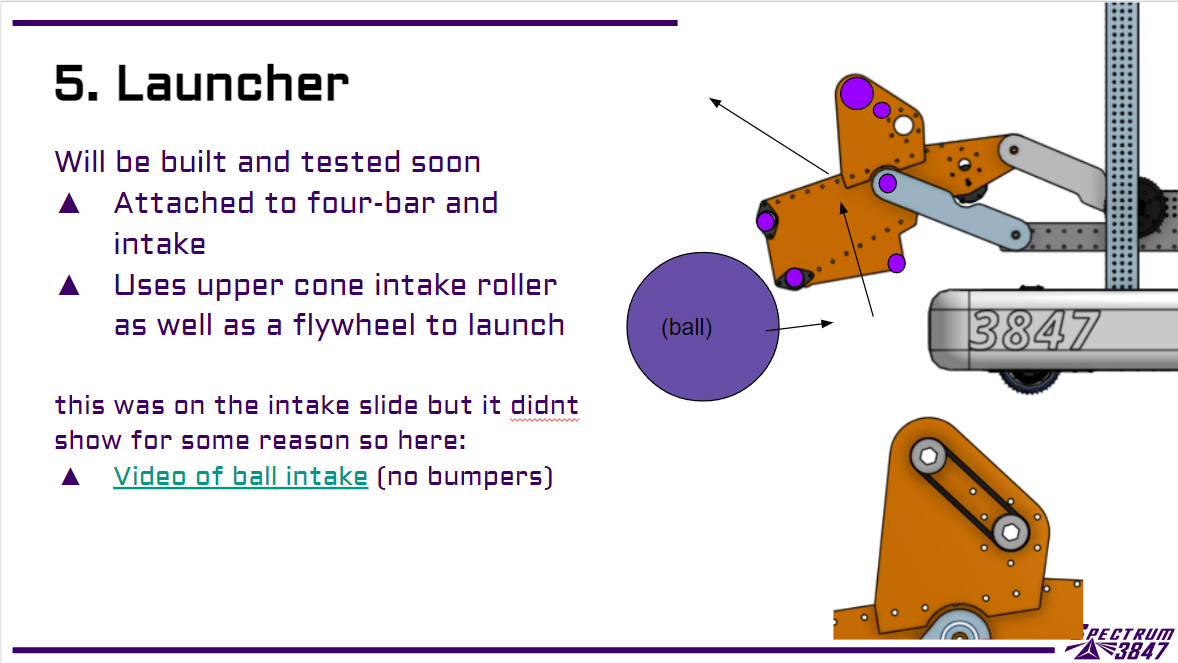
Launcher
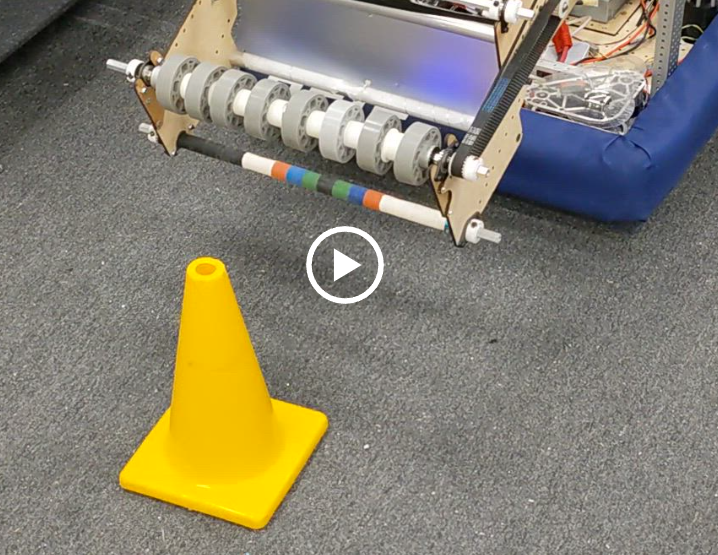
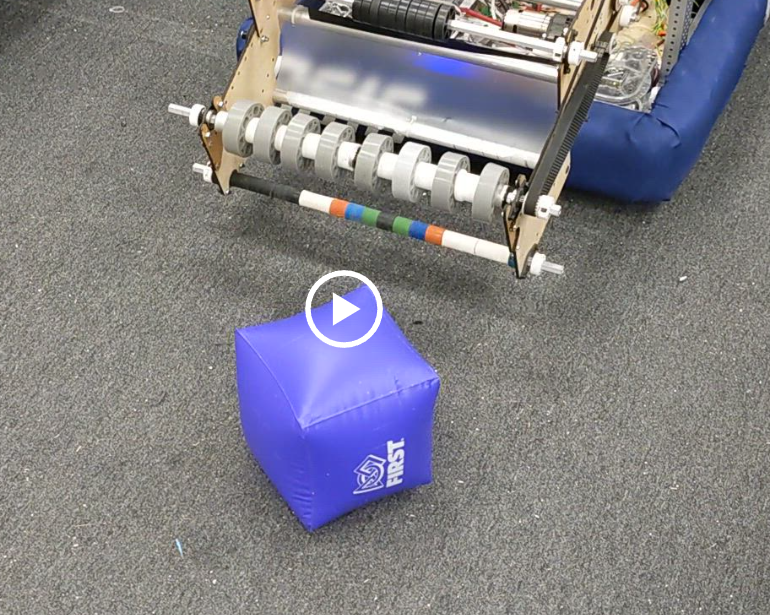
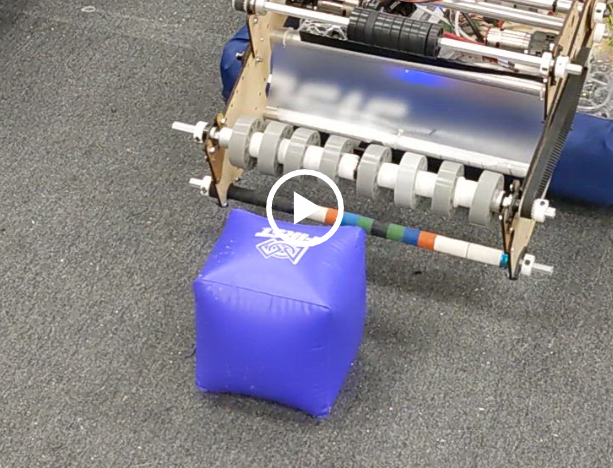
We did more testing on our launcher by replacing the launcher motor with a 12:18 gearbox with a Falcon 500. We also switched the 2” silicone rollers for 3” compliant wheels. Here are 2 videos about how that went:


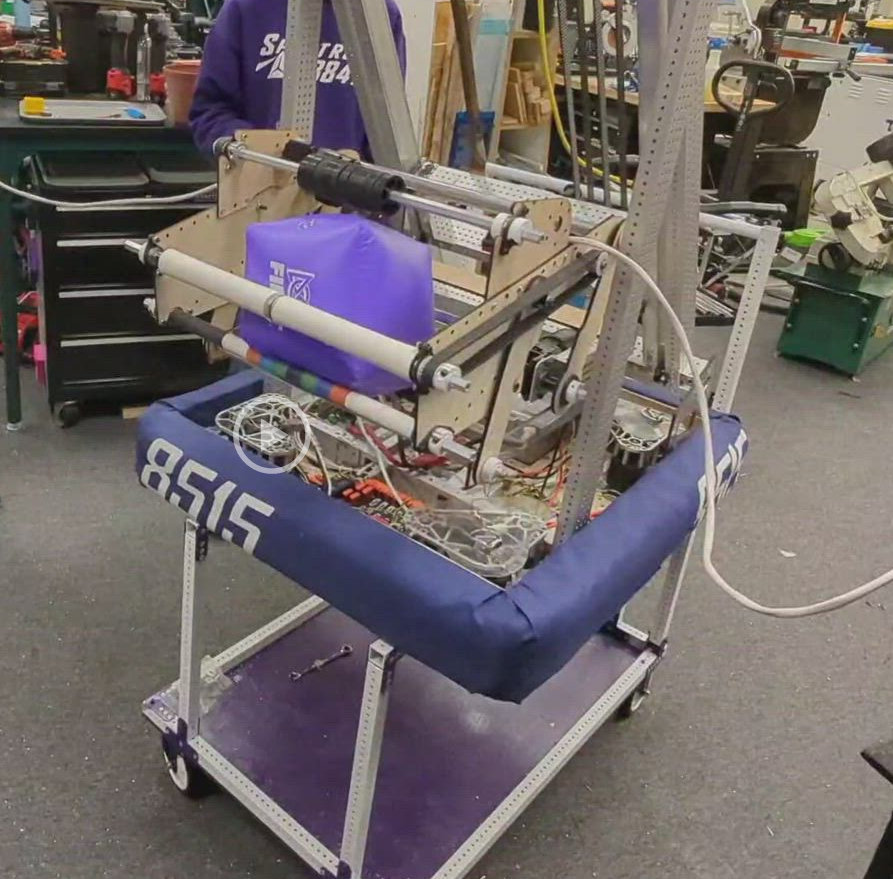
Practice bot swerve
We have been refurbishing out 2022 Comp bot swerve modules for our practice bot this year. It’s a really slow process and takes around 3 hours per module. 2 are done, and the rest will be done through the week. This is what our drivetrain for the practice bot looks like right now.

Saturday, January 28, 2023
Day 20-22: Intake and Practice bot
Intake
We experimented more with the intake these past two days. We have added a second roller to the bottom to better guide both the cone and cube into the correct position for transporting across the field. This lets us pull the nose cone up more and stops the cone from diving down and being held in an incorrect position for scoring. Other experiments can be seen in the photo gallery including a hard wooden floor that helped guide the nose but reduced the floor cone intake abilities.

Practice Bot
Practice and Competition bot; drive and elevator MAXtube rails were powder coated. We started assembling the practice bot elevator.

Wednesday, January 25, 2023
Day 19: Elevator Rails and intake testing
Intake Testing
We had some of our best intake tests today. One of the key points in an interactive design cycle is when you begin to understand what can be removed not just what can be added to allow the system to keep working but to make it simpler and more robust.
Yesterday Alpha’s intake had 3” compliant wheels on the top roller and launcher. Today we swapped those for 2” polycarb and silicone rubber (these are the hood rollers from our 2022 practice robot).
This test setup worked very well and allows us to build the intake lighter, simpler, and make it less expensive. This is just today’s version of the intake, we expect it will change many times over the season and probably before next week but it’s at a good progress point.
The current intake can
Intake cubes from the floor in the full down position.
Intake tipped-over cones from the floor when the nose is slightly pointed at the intake and the flange is inside the width of the intake. We estimate we have around 150 degrees of intake range on the cone. With training, we believe this should be good enough for our pilot to use this as an efficient loading option from the loading zone.
Intake standing cones if the intake/four bar are set to the correct height. The current intake is pretty height sensitive to standing cones. We need to be within in about a ¾” height window for it to intake well. This should be good enough for us to intake cones from the Human player shelf.
Things to experiment with
Intake from the single substation?
Improve storage geometry to make sure the cone tip always goes in the intake so we aren’t holding cones tilted up.
Ensure our grip on the cones is firm enough so we never drop a game piece.
Improve scoring geometry on high and mid posts.
Intake Standing and Tipped Over Cone

Intake Cube

1/25/2023 Intake Specs
Lower roller is just 1/2" hex with silicone tube floated on top.
Top roller is a 2" polycarb with silicone tube floated on it around it (actually, it's just our practice bot hood roller from last season).
Gap between the roller surfaces is around 4.75" in these tests and roller C-C is at a 73° angle from the floor.
Elevator Progress

We cut all of our elevator rails for the practice robot and competition robot. We also began laser cutting some of the additional parts.
WCP Inline Clamping bearing blocks are being powder coated, as are The Thrify Bot Elevator Gussets we will be using on the elevators.
Tuesday, January 24, 2023
Day 17 & 18: Week 3 Design Recap

Drive over the cable bump video
Drive up the charge station video


More can be seen on our Photo Gallery Week 2 and Week 3

Monday, January 23, 2023
Day 15 & 16
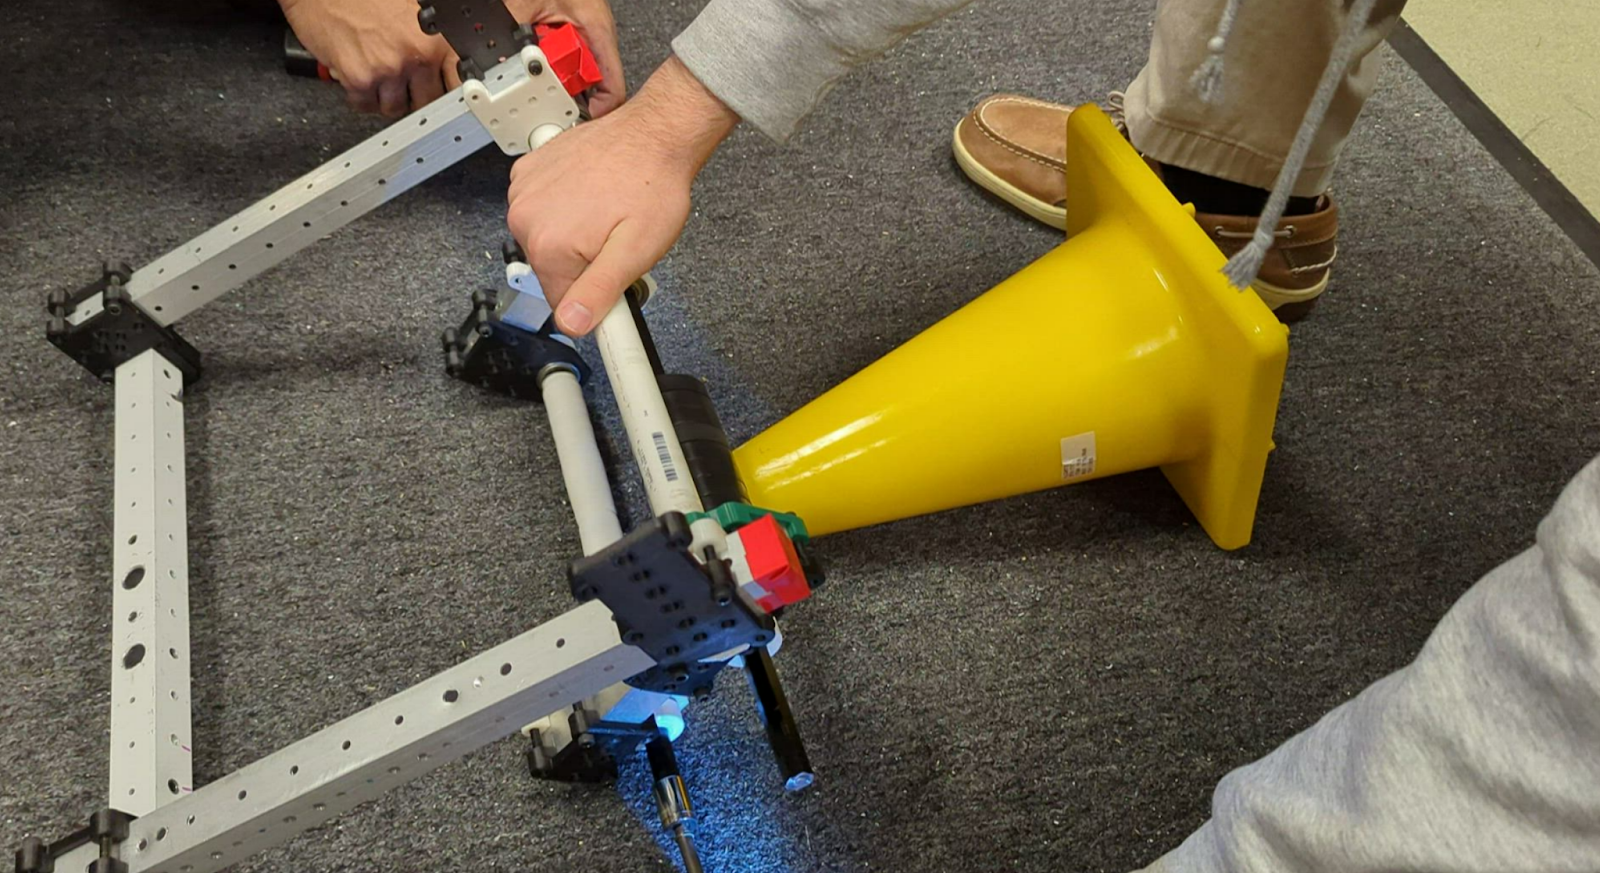
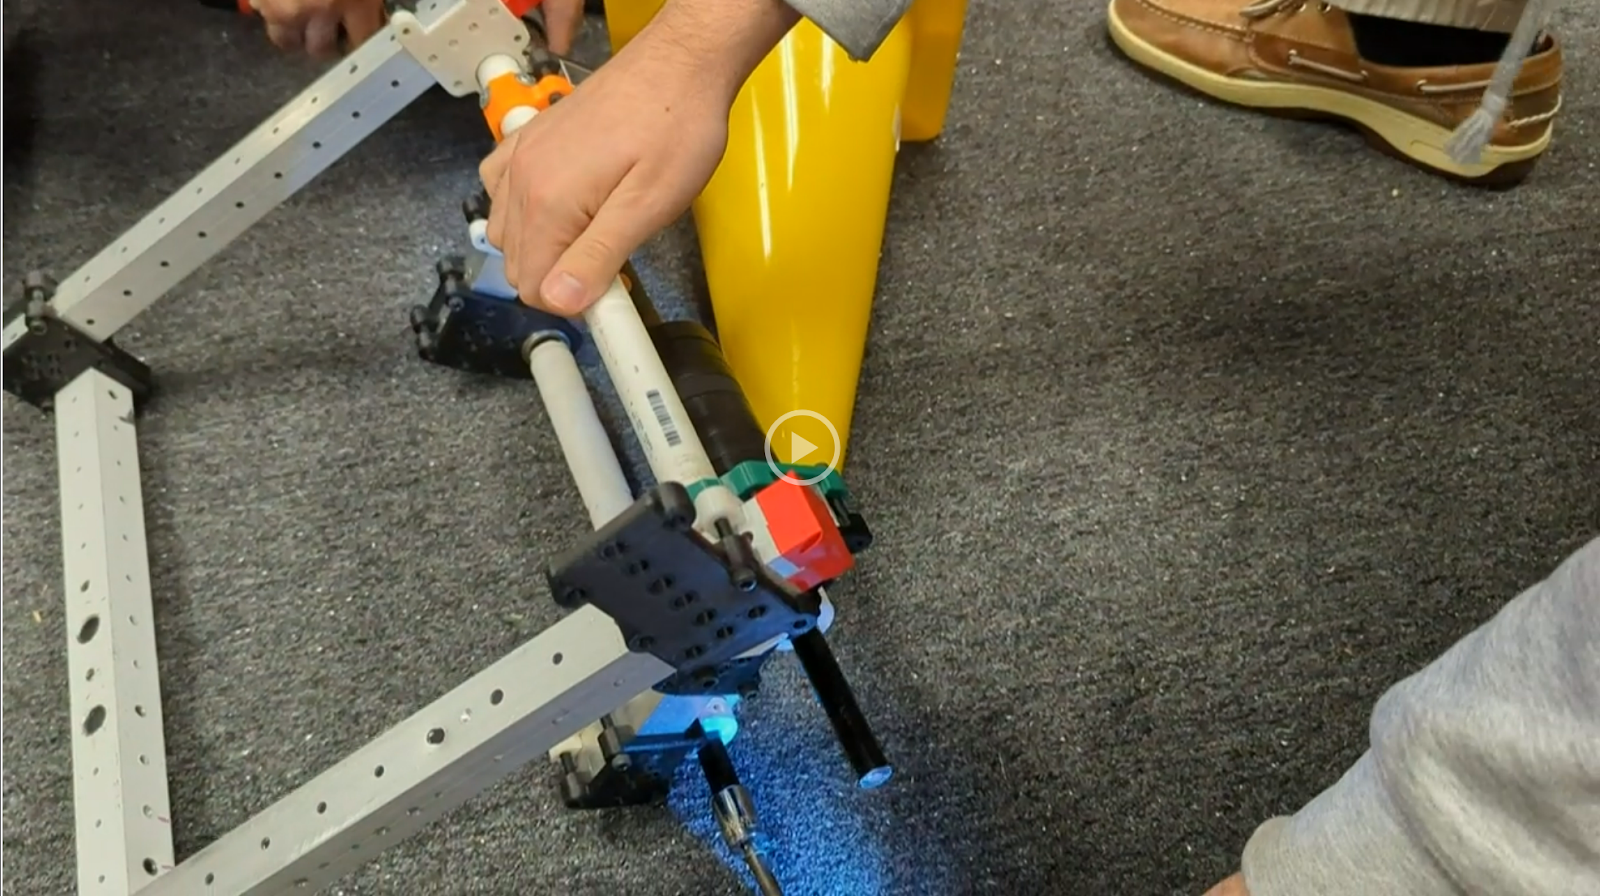
Cone Intake Testing
We are pretty happy with the test version of the cone intake. It’s able to pick up tipped-over cones that have their tip ahead of the flange and the flange within the width of the intake.
When at the right height it can pick up standing-up cones as well.

Cube Intake Testing
We don’t have the internal structure fully developed so the cube doesn’t like staying in but when we get the intake to the right height it pulls cubes in very quickly.
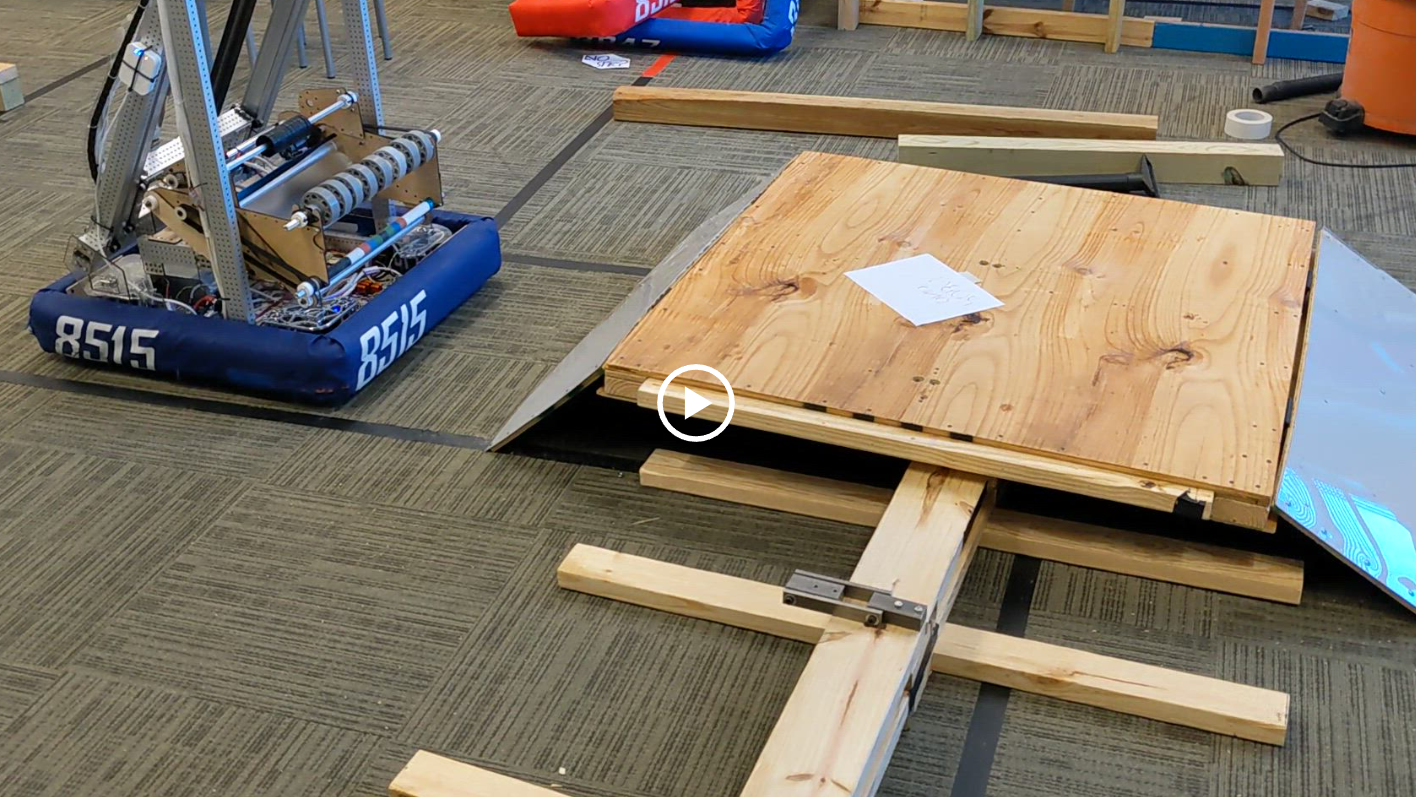
Basic Charge Station Test
We are still building part of the station but got enough built to see if Alpha could drive up
This is using unmodified SDS MK4i modules in the standard low 2x1 mounting configuration.
Day 13 & 14: It’s Always a Launching Game
Launching:
Today we experimented a bit with launching cubes and made some progress. There is still a lot of work to be done, and we are still changing all the spacing to see how the cube reacts.
Cone Intake:
We found that softer rollers seem to grip onto the cones better. We can intake cones at really aggressive angles. More refinement is still needed.
Wednesday, January 18, 2023
Day 12: Alpha Elevator Explained
Our Alpha elevator uses a timing belt and idler pulleys as its motion system. It’s designed around the 0.5” hole spacing on the REV Maxtube and uses the REV Max tube plugs to allow us to bolt the idlers into the rail.
The main drive pulley is a 32 HTD 5mm hex pulley with a TheThrifityBot 3D print ½” hex insert in it.
The belt for the elevator has to be designed so that each of the vertical run is perfectly vertical, any angle in those runs will cause the belt path to change total distance as the elevator moves up and down thru its motion.
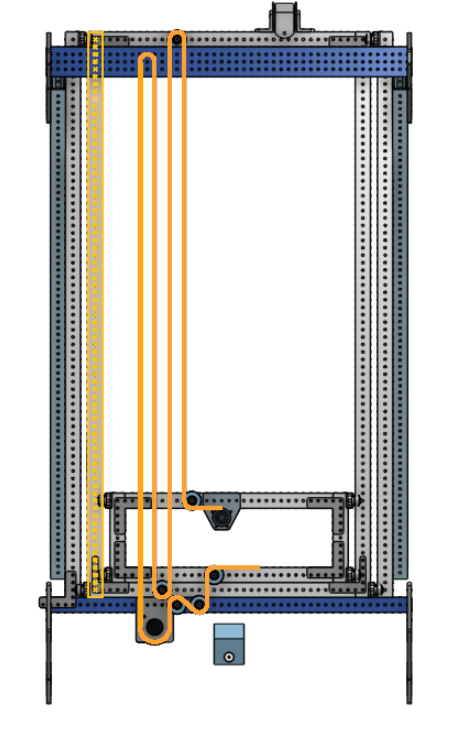
To allow these to be vertical paths we are 3D printing our own idler pulleys that are based on the width of the 5mm timing belt and the ½” hole spacing.
The 3D printed idlers are explained here
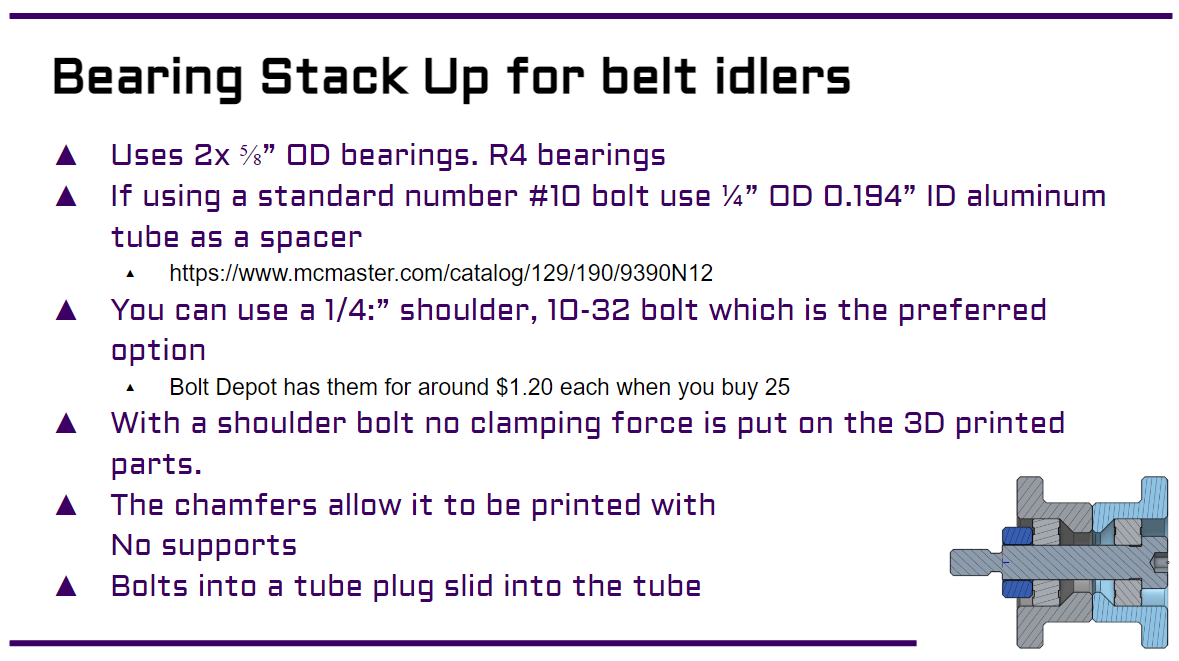
Tube Spacer Link: https://www.mcmaster.com/catalog/129/190/9390N12 We sanded these and then cut them to length on our lathe.
These spacers may also work for this purpose but we haven’t tried them yet - https://www.mcmaster.com/93441A425/
STLs and STEP files for the pulleys can be found here: https://www.printables.com/model/373552-spectrum-3847-5mm-htd-elevator-idler-pulleys
For Alpha, we are using 3D printed tube plugs with the ½” OD tube spacer and 3” long 10-32 bolts so they are supported through more of the tube and can’t bend as easily. We haven’t been able to test the shoulder bolt solution with the aluminum tube plugs yet as we are still waiting on that order to arrive. We will decide if we want to use the long bolts with tube spacers or the shoulder bolts in the coming weeks.
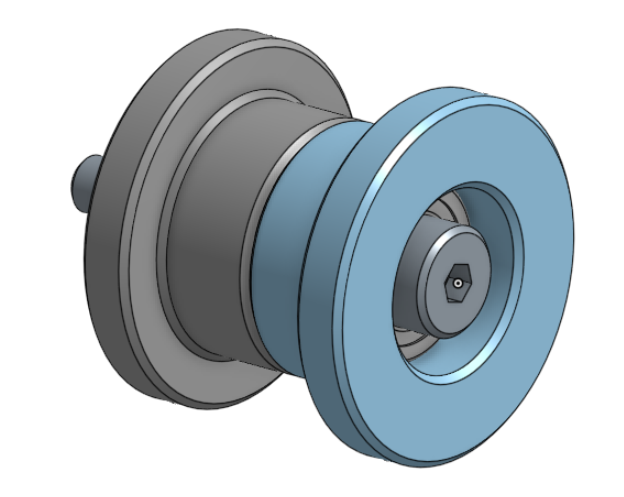
3D printed Idler pulleys for 5mm belts with ½” hole spacing.
The belt is tensioned by mounting one end of the belt to a hex shaft that is spinning in a ½” ratcheting wrench (you can also do this with a ⅜” wrench and ⅜” hex shaft). So if we need to add tension you just turn the shaft a few clicks tighter.
The other end of the belt is secured to the elevator using a laser-cut polycarb bracket and zip ties.
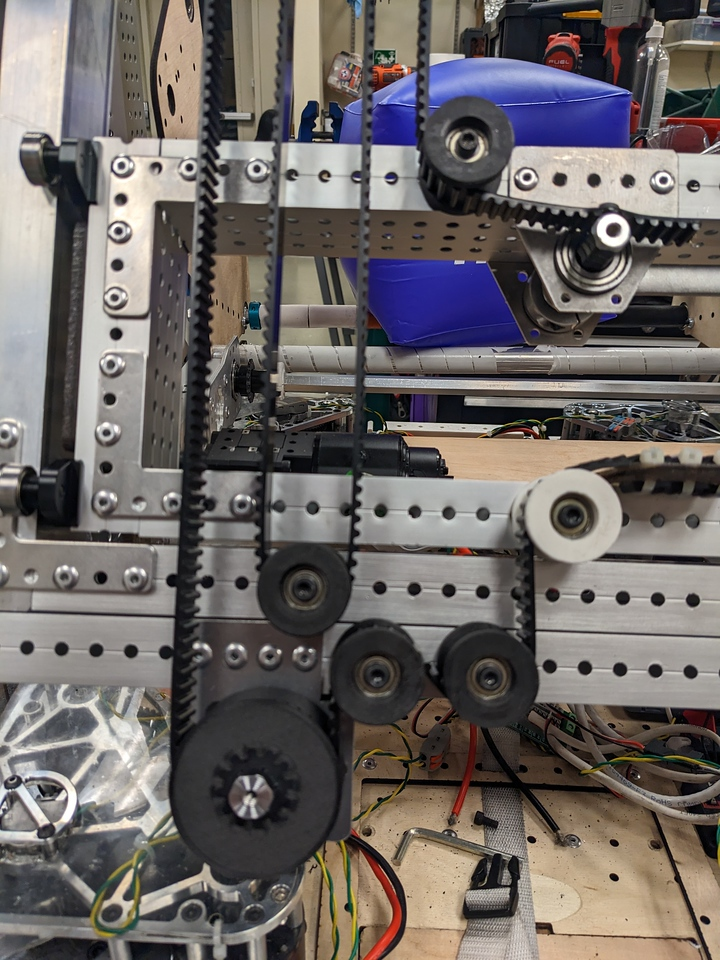
We are currently using TheThrifityBot Constant Force spring and mount from the TTB Elevator Kit but we will likely move to a custom design for our competition robot.
The side bearing blocks on the Alpha Robot are the TTB Bearing Block Kit and for our competition robot, we are planning to use WCP Inline Clamping blocks since their hole patterns line up with the REV tube and tube plugs.
Tuesday, January 17, 2023


Subscribe to:
Posts (Atom)